Scanning and Organizing Documents
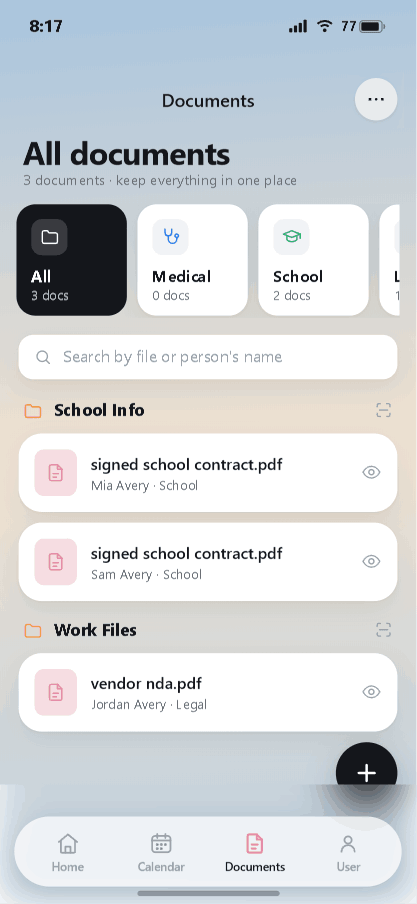
The Documents tab keeps every file you save — IEPs, lab results, insurance cards, contracts — in one searchable place.
The Documents tab
Tap Documents in the bottom bar. At the top, filter chips (All, Medical, School, and more) narrow the list, and the search box finds a file by its name or the person it belongs to. Files are grouped into folders, and the eye icon on any file opens a preview.
Adding a document
Tap the + button (bottom-right) to add a file. Give it a file name, then choose how to bring it in:
- Scan document — position the document in the frame and the app captures it.
- Browse & import — pick an existing PDF or image from your device.
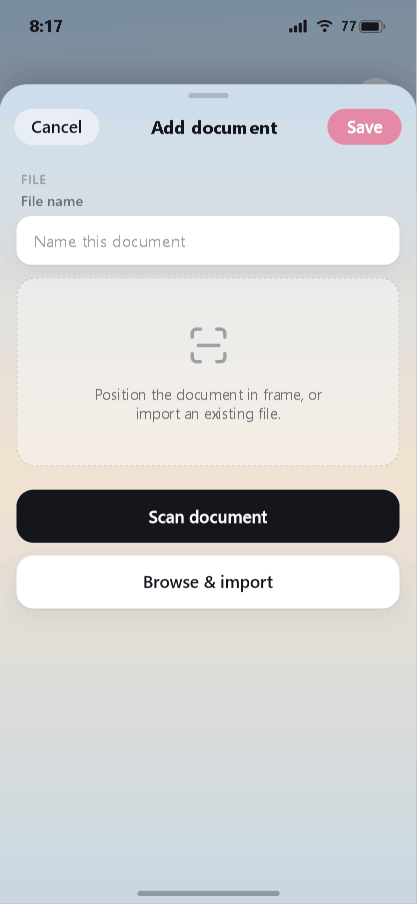
Tap Save when you're done.
Sorting and editing a document
Open a document to edit its details. Here you can set:
- Folder — group related files together (e.g. "School Info").
- Person — which loved one the file belongs to.
- Category — Medical, School, Legal, and so on.
- Notes — anything you want to remember about the file.

Tagging each file with a person and category is what makes the filters and search work — a few seconds here saves a lot of digging later. To remove a file, open it and tap Delete document.
Next: tracking medical info.
Stay organized with iDocThis
Keep the documents, notes, and dates that matter for Using iDocThis in one secure place.
Get startedRelated articles